Sunday, April 28, 2013

Om Ali (Egyptian Dessert)


Om Ali (pronounced, "uhm Ali") is a very popular and much loved dessert that originated in Egypt. The name of the dessert literally translates to "Ali's mother". The dish was named after her as she developed it. Well, I don't personally know Ali's mother, but I would like to thank her for bringing into existence one of the best tasting things I've ever eaten. Shukran (thank you)!! My friend from Egypt-Khadija-was kind enough to share her family recipe for this dish with me. 

This dish is a kind of bread pudding. The notable differences between this and bread pudding is that there is no use of eggs in this recipe. Also, puff-pastry or croissants are the bread base of choice in this dessert. This dessert is not as heavy as traditional bread pudding owing to the flaky, airy texture of the puff pastry or croissants used. A variation of nuts, fruits (dates or raisins) and whipping cream adorn this dessert. What's not to love?? It's as beautiful and exotic as it's country of origin, and delicious enough to please even the most discerning palette. Here's what you'll need to make it...

SERVING SIZE: Serves 6 sufficiently.

SPECIAL EQUIPMENT:
-6 8Oz ramekins, or one 8x11 rectangular baking pan (as shown in the picture).
-2 medium baking sheets.
-Pizza cutter or sharp knife (to cut the puff pastry).
-1 medium pan.
-Whisk.
-Hand-mixer, stand mixer or balloon whisk (for whipping the heavy cream).
-Spatula.
-Medium mixing bowl (for mixing your fruit, coconut flakes and nuts).                                                 


INGREDIENTS:
-1 17.5 Oz, package of puff-pastry sheets.
-1/3 cup golden raisins.
-1/2 cup dry-roasted pistachios.
-1/2 cup dry-roasted pine nuts.
-1/2 cup dry-roasted walnuts.
-1/2 cup dry-roasted almond slivers.
-1/2 cup dessicated coconut. If you can't find any, you can substitute it with coconut flakes for baking.
-1 teaspoon ground cinnamon.
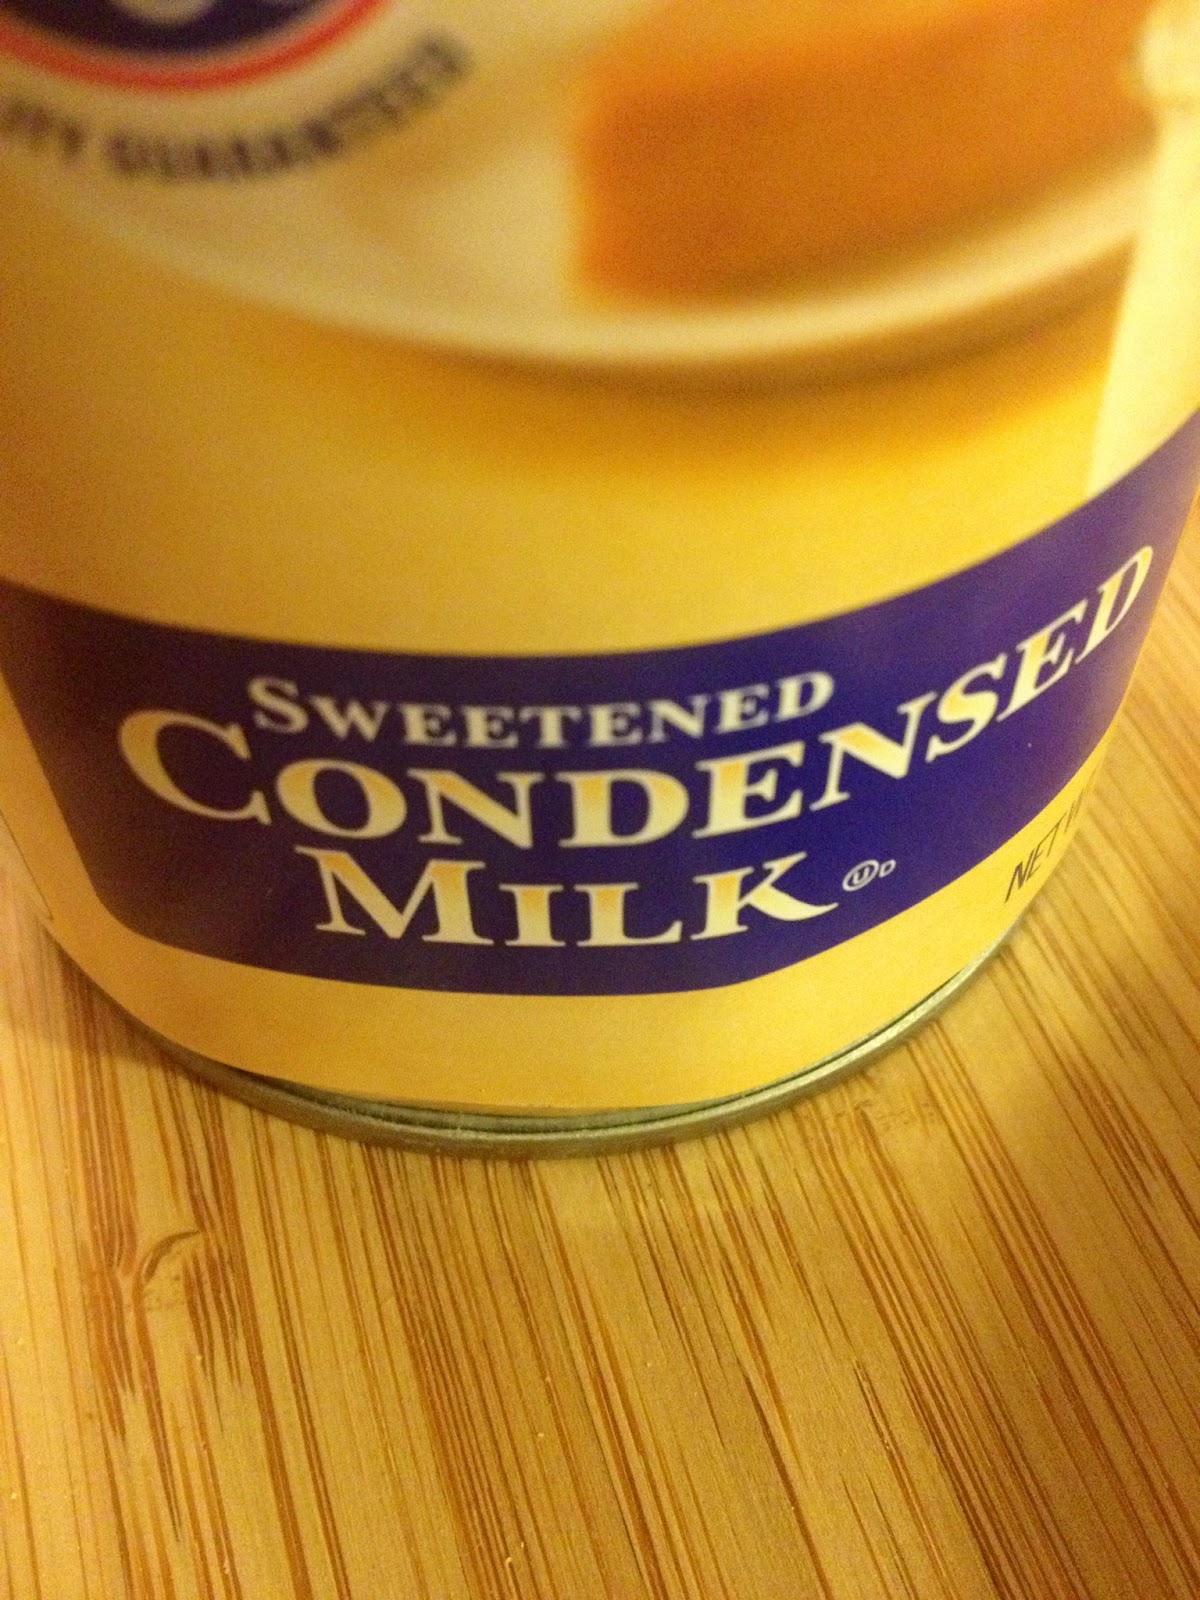
-1 14Oz. can of sweetened condensed milk (NOT evaporated milk!), mixed with 2 cups of whole milk OR 3 cups of half-and-half.
-1 teaspoon pure vanilla extract (optional).
-1/4 teaspoon orange blossom water OR rose water.                                                  


INSTRUCTIONS:
**25-30 minutes before you begin the preparation of this dish, thaw your puff-pastry by sitting it on the counter at room temperature for 25-30 minutes. Don't let it sit out longer than that or the puff pastry will become too pliable and hard to work with. if this happens, place the puff-pastry back in the refrigerator for about 10 mins, remove and continue with the steps below.**
-Use butter or cooking spray to coat the inside of your ramekins or your baking pan.

**Preheat your oven to 250 degrees Fahrenheit **

-On a baking sheet, spread all your nuts in a single layer and let them roast about 8 mins or until you begin to smell them. Do not let them burn! Roasting the nuts releases their flavors and enhances their color. Once done, remove the nuts from the oven and set them aside.

**Turn your oven up to 400 degrees Fahrenheit.**

-Using your pizza cutter or knife, cut the puff-pastry into  squares or rectangles. Pierce the tops with a fork to help release moisture as it bakes. Set aside 1/4 cup of the toasted mixed nuts (for garnishing).                                                   


-Place the squares on a baking sheet (no need to butter your baking sheets or use parchment paper as the pastry won't stick-it has plenty of butter).
-On the middle rack of the oven at 400 degrees Fahrenheit, bake the puff-pastry for 12-15 minutes until golden brown as shown in the picture below.                                                        
  
-Set the puff-pastry aside and allow to cool or it will burn your fingers as you tear it into little pieces.

**Turn your oven down to 350 degrees Fahrenheit**

INGREDIENTS FOR THE WHIPPING CREAM:
-2 cups of cold, heavy whipping cream.
-3 tablespoons of confectioners (powdered) sugar.
-1 teaspoon of pure vanilla extract.                                                    
                                
INSTRUCTIONS FOR MAKING THE WHIPPED CREAM:
-Using a balloon whisk, hand mixer or stand mixer. combine the above ingredients in a medium mixing bowl and whisk on medium speed until the whipping cream forms soft peaks when you try to lift it out of the bowl with a whisk or spoon as shown below. As soon as you see this, STOP MIXING or your whipped cream will deflate and turn into butter :(. Set aside.                                                         

                                                   
-Meanwhile, in the medium pan on medium heat, bring the sweetened condensed milk and whole milk to a boil. Add the 1 teaspoon of pure vanilla extract and the 1/4 teaspoon orange blossom water or rose water and stir. Remove the milk off of the stove as soon as it begins to boil and set aside.                                                      


-In the medium mixing bowl, combine the coconut, toasted nuts, raisins and cinnamon and toss well using a fork. Set aside.
-Break the baked, cooled puff-pastry into pinch-size pieces as shown in the video.
-Line the bottoms of these ramekins 1/3 way up with the pieces of puff-pastry. Press down with a fork.                                                      
-Add a layer of the mixed nuts, raisins and coconuts over the layer of puff-pastry (about 2-3 tablespoons). Press down.                                               


-Add another layer of torn puff-pastry over the layer of nuts and push down using the back of a fork or spoon.
-Pour the milk mixture over top of the puff-pastry/ nut mix and press down each time you pour, to help the puff-pastry absorb the milk mixture. Once you've pressed down all you can and some milk still comes up over the puff-pastry, its time to stop adding milk.                                                    

 
-Put around 2 tablespoons of the whipped cream over top of the puff-pastry/ milk mixture and smooth it out with either a spatula or a knife. Sprinkle some of the reserved nuts over top as shown in the picture. Repeat until all the ramekins have been assembled with the Um Ali.                                                        


-Place all the ramekins or your baking dish on a baking sheet. if you are using ramekins, make sure that they do not touch in order to ensure even baking.                                                       

-Bake until the tops of the Um Ali are a light golden-brown and the milk in the Um Ali begins to bubble.

**Turn your oven to "broil"**

-With the oven door slightly ajar, let the Um Ali's broil for 1-2 minutes until the tops are nice and caramelized. Please do not walk away from your Um Ali at this time for anything or they will burn!                                                


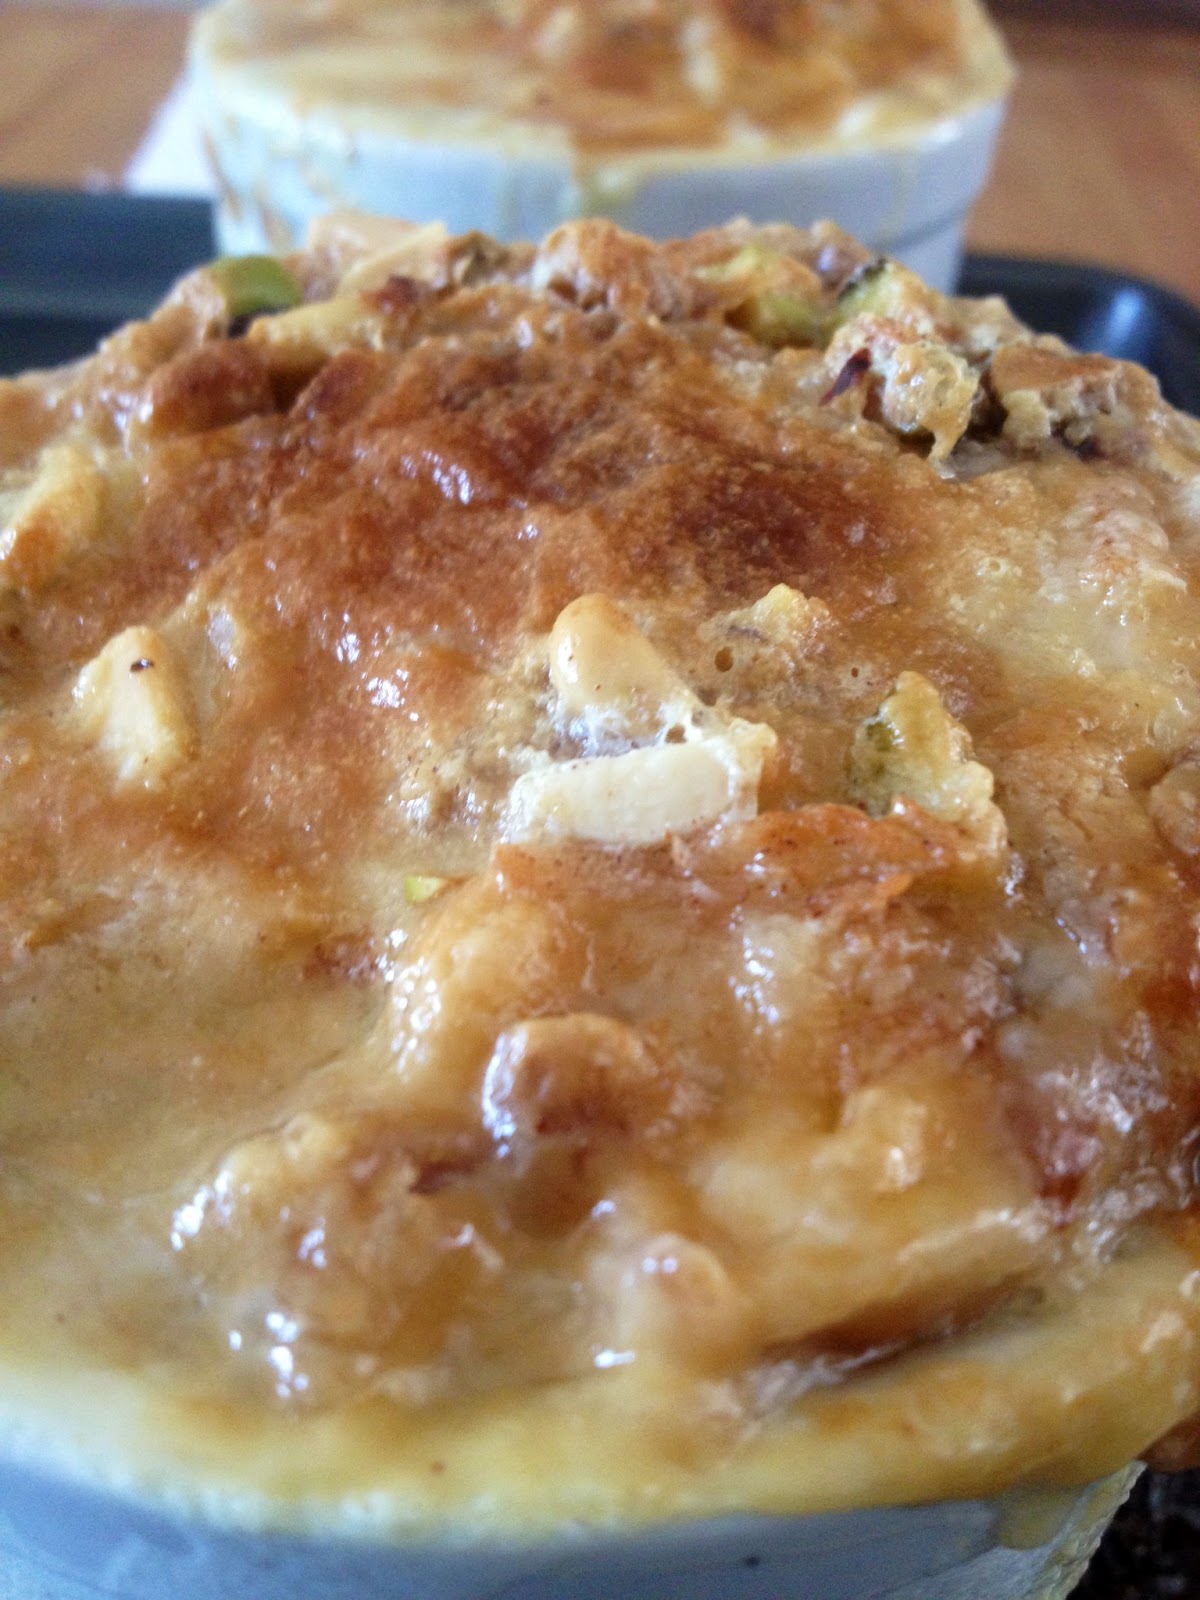
-Remove your dessert from the oven, let it cool for about 10 minutes. Sprinkle with some more of the reserved nuts (optional). This dessert is best served warm. Now how exotic is that?!? Enjoy!!                                                      


PS: Hubby experimented by adding a drizzle of chocolate syrup over the pudding....sweet heavens!! I didn't think it would be possible to make this dessert any better than it already was-but it did!!

Sunday, April 14, 2013

Vibibi vya tui (Kenyan mini rice & coconut pancakes with coconut syrup. Gluten-free optional)


For those of you out there who are on a gluten-free diet, I would like you to know that THERE IS HOPE! You do not have to sit out in envy anymore and watch others devour stacks of pancakes. I could only imagine how mad that would make me! This recipe is gluten-free optional (you can substitute the flour that is called for in the recipe with cornstarch and still get fantastic results). Vibibis are a staple breakfast and snack item amongst the Swahili of the Kenyan coast. These are mini pancakes made out of rice and coconut milk. Add cardamom to the mix and you have a flavor party- to which you are all invited :). Kibibi is the single pancake, vibibi is when there's more than one. Kibibi in English, translates to "Young lady". In which case, here's how to make this bevy of young ladies. 

SERVING SIZE: Feeds 4-6 people.

SPECIAL EQUIPMENT:
-Small frying pan with lid.
-Large mixing bowl with lid.
-Medium pan with lid.
-Whisk.
-Wide turner.
-Large serving platter.
-Deep plate.
-Ladle.

INGREDIENTS FOR THE VIBIBIS:
-2 cups of basmati rice, washed, soaked overnight and drained (alternatively, you can substitute the rice with rice flour. if you use the rice flour, just blend it with the other ingredients in the blender).
-2 cups of heavy coconut milk.
-1 tablespoon of sugar.
-1 heaped teaspoon of rapid rise yeast (as seen in the video). If you decide to use active dry yeast, PLEASE make sure to activate your yeast before adding it to the rice, coconut milk and sugar, or your batter will not rise like its supposed to!!
-2 tablespoons of all purpose flour OR 2 tablespoons of cornstarch if you want a gluten-free version of these pancakes.
-1/2 teaspoon of ground cardamom.
-3/4 cup granulated sugar.
-1 whole egg, slightly beaten.
-Ghee (clarified butter) or pure coconut oil or vegetable oil to cook.


INGREDIENTS FOR THE SYRUP:
-1 can heavy coconut milk (about 2 cups).
-1 tablespoons all-purpose flour OR 1 tablespoon of cornstarch (if you're making the gluten-free version of these pancakes).
-1/4 teaspoon cardamom powder.
-1/4 cup granulated sugar.

INSTRUCTIONS FOR MAKING THE RICE BATTER:
-Put the drained rice, 1 tablespoon of sugar, 1 teaspoon of rapid rise yeast and the 2 cups of coconut milk in the blender and puree until smooth and there are no bits of rice in the batter.
-Let it sit covered in a warm place for about 1 hour.
-After 1 hour, add the 3/4 cup sugar and egg. Whisk. Let it sit for 20-30mins until batter is thick.                                              


INSTRUCTIONS FOR MAKING THE SYRUP:
-In the medium pan, on medium heat, combine the ingredients for the syrup and let it come to a boil. The syrup should be thick. Turn off the heat once the syrup reduces (thickens).                                                   


-In the deep plate, ladle some of the warm coconut syrup (this will be used to coat the vibibis as you cook them. Add more syrup as needed).                                                      


INSTRUCTIONS FOR COOKING THE VIBIBIS:
-In the small frying pan, add 1/4 teaspoon of ghee or cooking oil. A healthier alternative that would enhance the flavor for the vibibis would be pure coconut cooking oil (see picture in ingredient list).                                                       

        
-Pour about 1 cup of the batter into the heated frying pan. Traditionally, vibibis are as thick as buttermilk pancakes. However, if you'd like a thinner pancake, pour less batter into the pan.                                                        


-Once you see holes forming on the surface of the kibibi and there is no more wet batter on the surface, apply 1/4 teaspoon of ghee, coconut oil or vegetable oil on the surface of the kibibi (if your kibibi is still as wet as the one shown in the picture below, it is not ready for the next step. let is dry out a little more).                                                       


-Gently flip the pancake over with your turner and cover the pan. Let the kibibi cook for about 3 minutes. the kibibi should be the color shown in the picture (darker than a regular pancake).                                                      


-Once each kibibi is cooked on both sides, place them in the deep plate that has syrup in it, making sure to coat both sides of the kibibi with the syrup.                                                     


-Transfer the coated kibibi on to the waiting serving platter. Stagger them as shown in the picture (kind of lay them on top of each other).                                                     


-Repeat these steps until all the batter is used up. To keep your vibibis warm as you continue making the batch, you can place the serving platter in a warm oven until you are done (make sure your serving platter is oven-safe first).
-When ready to serve, drizzle the remaining coconut syrup over an individual's serving of the vibibis and enjoy.                                                   


These are best served warm. I served mine up as part of brunch this morning. These also go well with tea or coffee. Enjoy!!


Monday, April 8, 2013

Wali wa nazi (coconut rice) with Peanut chicken stew & guava & creamcheese crescent rolls


There were very few things growing up that would make the girls in our house "disappear" like the daunting task of "kukuna nazi". That is Swahili for grating the flesh of the coconut, which literally translates to "scratching" the coconut. Here's why:


You see this little contraption in the picture above? This is the infamous mbuzi that my sisters and I so dreaded. Not to be confused with a goat, which is also called mbuzi in Swahili, this contraption was no more than 5 inches off the ground. One would have to straddle it facing the serrated claw with both your palms firmly clasping one half of a coconut. In a back-and-forth motion, you would then proceed to scrape the flesh of the coconut against that sharp, serrated claw. On many occasions, I scraped the skin right off of my hand trying to grate the coconut. At that point began my love-hate relationship with the contraption. Out of that grated coconut, we would make coconut milk or tui la nazi using a long, conical basket , hot water and elbow grease. The first rendering of the freshly squeezed coconut milk was always thick. That was referred to as tui la kwanza (the first tui). Subsequent renderings using the same grated coconut was referred to as tui la pili (second tui). This second rendering was much lighter. 

My mom is a no-nonsense woman, but very loving. Noticing how her daughters would disappear on the day any coconut recipes were to appear on the menu, she made it a rule that if you wanted to eat, you had to participate in the meal preparation. So, much to the chagrin of my sisters and I, we scraped those coconuts every single time. You might wonder then, how come so many of my recipes include coconut. Well, I came to discover this magical thing called canned coconut milk in the US. I don't have to part with parts of my epidermis for the sake of freshly grated coconut?? WHAT?? YES PLEASE!! What is ironic though, is that years after I relocated to the US, canned coconut milk is now readily available in stores in Kenya :/

So I will happily share with you all the recipes I know that include coconut milk in the list of ingredients. With a promise that no fingers shall be scraped in the preparation of any of these meals. Today I will share with you the recipe for coconut rice and peanut chicken stew. 

For the dessert in this video, check out my "Guava & Cream Cheese Crescent Rolls" post for step-by-step instructions (with photos) of how to prepare them.

This peanut chicken stew recipe is a variation of a peanut chicken recipe found in many other parts of Africa. I have added spinach to the recipe to make the meal more nutritious and to up the taste factor. The coconut rice is a prevalent dish along the Kenyan and Tanzanian coastal cities. The guava and cream cheese crescent rolls are just something I came up with in my kitchen.

SERVING SIZE FOR RICE: Feeds 6-8 sufficiently.

EQUIPMENT NEEDED:
-1 medium pan with a lid.
-Oven-safe dish.
-Aluminium foil.

INGREDIENTS:
-2 cups of Basmati rice, washed, soaked for 20-30 minutes and drained.
-4 cups of light coconut milk (alternatively, you can combine one can of heavy coconut milk with 2 cups of water).
-3/4-1 tablespoon of salt (I use Kosher salt).
-1/2 cup heavy coconut milk.


INSTRUCTIONS:
-In your pan, on medium heat, bring the can pf coconut milk (2 cups), the 2 cups of water and salt to a boil.


-Add the drained rice into the boiling water and gently stir. Taste the water/coconut milk in the pan for saltiness. If its not salty enough for you, add some more salt. Your rice needs to be well seasoned or it will smell nice, but taste bland.
-Cover the pot, reduce the heat to medium-low and let the rice cook for 20 minutes or until the coconut/water does not bubble over the surface of the rice.
-Add the 1/2 cup of heavy coconut milk and let it simmer for an additional 8-10 minutes. Check to see if the rice is cooked by pressing a grain of rice between your thumb and index finger. It should not be hard or aldente.
**Preheat your oven to 250 degrees Fahrenheit.
-Once you've made sure that the rice is cooked, it is now time to "dry" the rice. Transfer the rice to an oven-safe dish, uncovered, and place it on the middle rack of the oven. Let it "dry out" for 8-10 minutes.
-Turn the oven down to "warm" and cover the dish with aluminium foil until you are ready to serve the rice.

INGREDIENTS FOR THE PEANUT CHICKEN:
-1 1/2-2 Lbs boneless, skinless chicken breast, cubed into bite-sized pieces.
-1/2 cup water to cook the chicken and create chicken stock.
-1 medium onion, finely chopped.
-2 cups of spinach, chopped.
-Juice of half a lemon.
-2 tablespoons tomato paste.
-2 tablespoons creamy peanut butter.
-1 tablespoon ginger/garlic paste.
-1/2 teaspoon ground coriander.
-1 teaspoon curry powder.
-1 teaspoon ground cumin.
-1 teaspoon ground cinnamon.
-3/4 teaspoon red chili powder.
-2 tablespoons of vegetable oil (to cook the chicken).
-1 teaspoon salt.


INSTRUCTIONS FOR COOKING THE CHICKEN:
-In a medium pan  that's covered, on medium heat, cook the chicken in the 1/2 cup of water for 10 minutes until there is no pink showing.


-Drain the chicken stock into a separate bowl and reserve.
-In a larger pan, on medium heat, saute the onions until golden brown.
-Add the ginger/garlic paste and stir. Cook for 3 minutes.
-Add the curry powder and other spices, stirring constantly. If the spices/onion mix seems too dry, slowly add a little bit of the reserved chicken stock and stir.
-Add the tomato paste to the pan. Stir.
-Add the chicken to the pan and stir well so that all the chicken pieces are well coated with the onion/spice mixture.
-Add the lemon juice and stir.
-Add the rest of the reserved chicken stock and stir well.
-Add the peanut-butter and let it dissolve into the stew. Stir.
-Cover the pan and let the chicken simmer on medium-low heat for 10-15 minutes. If, after this duration the stew seems to thick, add about 1/2 cup of water to the pan and stir. Taste for salt. If needed, add more.


-Add the chopped spinach to the pan, stir well, cover and let it simmer on medium-low heat for another 8-10 minutes. Your stew is now ready to be served. Enjoy!


Besides rice, this stew also goes well with chapati, mashed potatoes, sweet potatoes or ugali.